Showing posts with label papercraft star. Show all posts

Wednesday, September 22, 2010

Papercraft Star Challenge #14

Hi Everyone,

I know you checked out my sneak peek earlier this week with the designer inspiration and have been dying to see the whole thing! I will show you; but first I want to tell you about the challenge and a little about Papercraft Star Challenge Blog.

About Papercraft Star:
Papercraft Star offers a variety of papercraft challenges for all skill levels, as well as scrapbook, card making and altered art ideas and inspiration. We provide challenge information well ahead of time, so YOU our viewers can have as much time as you need to prepare for the challenges with your best work; this is because Papercraft Star is unique in that our blog is designed to let the public vote for their favorites each week, as well as participate in the weekly challenges.

The Challenge this week is called 'Simon Says'

Simon Says Follow this Recipe:
Make a Card
Base: 5.5 x 5.5
Mat: 5 x 5
Score Mat 5 times at 1/4 inch
3 Flowers from Die Cut or Punch
3 Buttons and Twine
(You may also add a sentiment or other items as desired)


I hope you'll hope over to papercraft star and see the challenge and inspiration this week, I'm thinking this may get you wondering, and makes you think about what YOU can create along with us! Jump over and see the first days worth of Designer Inspiration on Wednesday!

The prize for winning the people's choice over at Papercraft Star is the 'People's Choice Award' Button for your blog! Since the winners are voted on by the general public it really is super special to get and lets everyone know you were voted the people's choice winner, and sometimes the judges even throw in an extra special surprise gift!

You can enter your submission through InLinkz on Papercraft Star (card/layout/papercraft of any sort!) until Friday at midnight EST. I hope you can join us!

Supplies:
Cricut Expression Machine
Accent Essentials Cartridge
All paper-- My Minds Eye, whirlybird collection
Tim Holtz Distress Ink in Worn Lipstick
Stamp by Studio G

Wednesday, September 15, 2010

Papercraft Star Challenge #13

For papercraft star challenge #13, we are basing our layouts from a sketch we were provided. A very funky sketch, but much more intricate than I'm used to.
I did a layout of Zoe, at three months, and it showcases just how much hair she had then. Her hair is almost down to her butt, and a beautiful flax blonde color now; so the changes are just amazing!


I hope you'll hope over to papercraft star and see the challenge and inspiration this week, I'm thinking this may get you wondering, and makes you think about what YOU can create along with us! Jump over and see the first days worth of Designer Inspiration on Wednesday!


The prize for winning the people's choice over at Papercraft Star is the 'People's Choice Award' Button for your blog! Since the winners are voted on by the general public it really is super special to get and lets everyone know you were voted the people's choice winner, and sometimes the judges even throw in an extra special surprise gift!

You can enter your submission through InLinkz on Papercraft Star (card/layout/papercraft of any sort!) until Friday at midnight EST. I hope you can join us!
Supplies:
All paper-- My Minds Eye, whirlybird collection
letter stickers (for 'One Hairy') are by American Crafts and purchased at Lila's Scrapbooking
letter stickers (for 'Baby') are by Recollections for Michaels
3 Months chipboard letters are by Sassafras
Brads are all from Lila's Scrapbooking
Tim Holtz Distress Ink in Peeled Paint
Chalk Ink in Dark Peony

Wednesday, September 8, 2010

Papercraft Star Challenge 12 Designers Inspiration and Information

Over at Papercraft Star, the challenge this week is based on this photo:
The prize for winning the people's choice over at Papercraft Star is the 'People's Choice Award' Button for your blog! Since the winners are voted on by the general public it really is super special to get and lets everyone know you were voted the people's choice winner, and sometimes the judges even throw in an extra special surprise gift!
You can enter your submission through InLinkz on Papercraft Star (card/layout/papercraft of any sort!) until Friday at midnight EST. I hope you can join us!
This was my submission, I hope you love it!
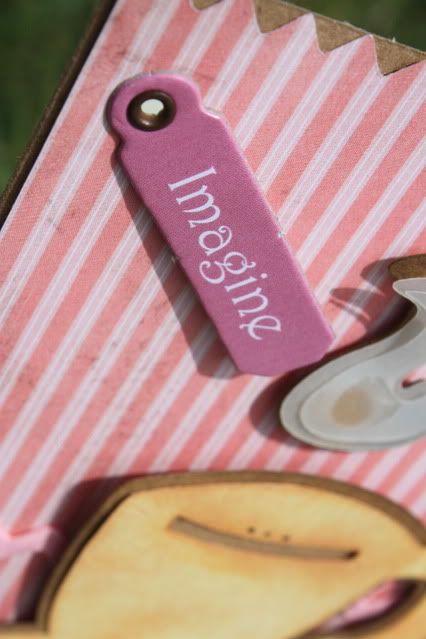
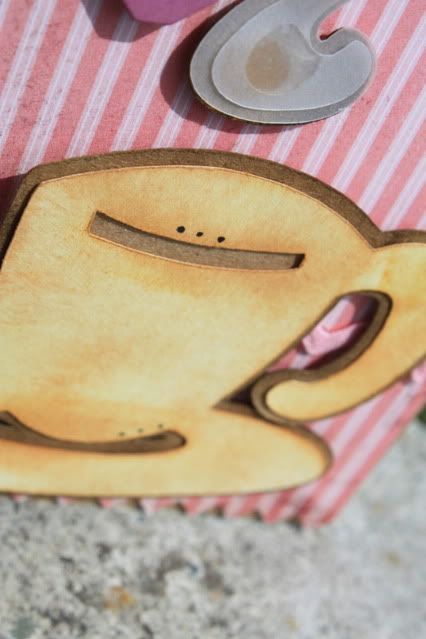
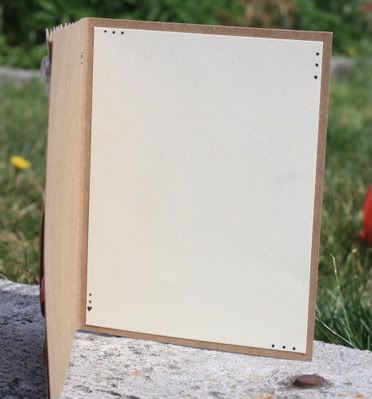
This is the inside, I decided to mat it, so it would be easier to write in. I've attached some close ups so you can see the detail of the card.

For the 'steam' rising off the cup, I used vellum to make it more transparent, and then layered it.

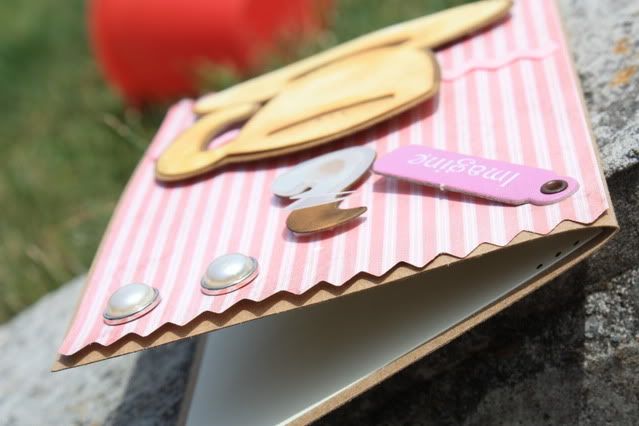
Here is the view from the 'top' of the card, so you can see the dimensional elements of the card.

I hope you've enjoyed my inspiration for ya'll this challenge week, and I urge you to check out all the other designer inspiration as well! You can see them all in one place at Papercraft Star, and I've got a section on the left side bar with links to all the Papercraft Star Design Team's blogs.
Voting for the People's Choice Winner starts bright and early Saturday Morning, and goes through Monday. Winners will be announced Tuesday. While you're over there, remember that there is also a Papercraft Star Message Board, where you can talk to the designers and other users to discuss projects, accomplishments and anything else!

Supplies:
Kraft Cardstock for card base
Patterned Mat Paper (started as a 5.5 sq. piece and I trimmed about 1/2" off two sides, leaving the ric rak edges at the top and bottom)
Pink Rick Rak (under cup) is by Pickle Trims (baby collection) from Rusty Pickle
Cream Cardstock (for Cup from Beyond Birthdays Cricut Cartridge)
Kraft Cardstock for shadow
Vellum for the 'steam' shadow and main layer
'Imagine' tag is from a tag pack in Joanne's $1 bin
Pearl Brads from my stash
Cricut Machine & Gypsy
Beyond Birthdays Cricut Cartridge
Black Sakura Gelly Roll Pen
ATG Gun
Pop Dots
Glue dots

I hope you'll join us!

Enjoy!
Dawn

Monday, September 6, 2010

Papercraft Star, Challenge 12 Sneak Peek!

Over at Papercraft Star, the challenge this week is based on this photo:

I wanted to give you guys a little Sneak Peek at what I've created for this challenge!


I hope this gets you wondering, and makes you think about what YOU can create along with us! Jump over and see the first days worth of Designer Inspiration on Wednesday!


The prize for winning the people's choice over at Papercraft Star is the 'People's Choice Award' Button for your blog! Since the winners are voted on by the general public it really is super special to get and lets everyone know you were voted the people's choice winner, and sometimes the judges even throw in an extra special surprise gift!


You can enter your submission through InLinkz on Papercraft Star (card/layout/papercraft of any sort!) until Friday at midnight EST. I hope you can join us!

Wednesday, September 1, 2010

Papercraft Star, Challenge #11-- Back 2 School


Over at Papercraft Star, we are in the midst of a Back to School themed challenge. The goal was to use a die cut system of some sort. I used my Cricut Expressions & Stretch Your Imagination Cartridge for the adorable, yet whimsical little bus.
Supplies:
Cricut Machine
Stretch Your Imagination Cartridge
Blue Metallic Cardstock (I used TPC Studios Royal Blue Shimmer, since once side is darker (base) and one is lighter (embossed layer)
Kraft Cardstock
Sakura White Gelly Roll Pen
Hemp Twine
Black Pen
Cuttlebug Embossing Folder, Circles
Directions:
1. Cut your metallic dark blue cardstock to 8.5X 5.5. Fold in half, hamburger style.
2. Cut a yellow mat at 4X5.25. Stick down.
3. Cut a lighter blue metallic layer at 3.75X5 and emboss using the 'circles 'Cuttlebug Folder. on one side, wrap a few times with natural twine (I used hemp twine), and double knot to hold. Then adhere onto yellow mat.
4. Using the Stretch Your Imagine Cricut cartridge, cut each layer of the schoolbus, in the colors you choose. I usedmy Gypsy and hid all the contours of the shadow cut, and cut in Kraft Cardstock.
5. Glue layers together, and using pop dots, adhere to the card front.
6. Cut the tag @ 2". Add a white square- and scribble your note on.
7. String the tag through one of sides of cording, and tie it on loosely.
Embellish as you wish. You could easily add some glitter, I added white dots with a gelly pen, as well as colored where the hubcabs on the bus would be silver. I hope you can come over and play along! Entries can be linked until Friday @ Midnight EST.

And voting starts bright and early Saturday Morning, and goes through Monday.
Winners will be announced Tuesday.
Enjoy!
Dawn

Sunday, August 29, 2010

Zoe's Cardboard Cow @ Evergreen State Fair


Today, we spent almost the whole day at the Evergreen State Fair in Monroe. I got to do some judging on herdsmanship for the 4H Cattle Clubs and Man, it was tough! All those kids are good. They did an amazing job of cleaning up after their animals, taking great care of them and keeping the beef barn clean for their guests. Great looking bovine.
Now, onto the cardboard bovine show. For insurance and safety reasons, kids under 9 years old, and not in the third grade cannot show live bovine (and I doubt they want to show dead ones) so they have a little show for the younger crowd of cardboard cows, that the kids decorate and then show. Zoe got to do this.
This is her with her cow on display, before the show. You may notice some Cricut 'tattoos' that she insisted we add.


Here she is in the show ring, walking her cow around to show the judges.

And, there it is: here 1st ribbon!

Growing up, I was the little girl who always wanted a pony, and once I was old enough bought one with my mom. We still have her to this day (7 years later) and although my mom does majority of the care, it is nice to know that as Zoe gets older she will have the chance to do 4-H with Latte. I'm not sure we have much of a cow future, since we don't have the space in our little suburban rental; but it's always possible.

We had a great day; ate wayyyyy too much fair food (like a bloomin' onion for lunch; funnel cake for dinner) and did lots of walking so we're all exhausted tonight... I'm still waiting for Zoe to crash (and it's 8:30pm, with no nap!) but I think she's still running on sugar.

Be sure you hop over to Papercraft Star and vote for your favorite project. Voting ends tonight at midnight EST.

Enjoy!

Dawn

Saturday, August 28, 2010

Papercraft Star, challenge 11 Teaser


The challenge at Papercraft Star this week is back to school using a die cut system of some sort.
Here is your teaser! :-)
Make sure you stop by Papercraft Star Thursday, Sept 2nd when my project will be featured so you can see it as well as lots of other inspiration. I will also have my directions posted of this project on Thursday here.
I hope you'll join us in the challenge!
Enjoy!
Dawn

Wednesday, August 25, 2010

Papercraft Star Challenge #10- Always Drink Upstream From the Herd Card

I know you've all been waiting for this one, I've been anxious to show you!


My Papercraft Star Challenge 10 inspiration entry went live today

Over at Papercraft Star, the challenge is a clean and simple sketch for a card (see lower). The prize for this challenge is a blog button, letting everyonek now you were voted the people's choice winner and sometimes even an extra special surprise gift (last week was a $10 Paper Trey Ink Gift Card!). Laugh away! I thought it was the perfect opportunity to use my Rusty Pickle Stickers, and this horse print paper I had laying around. :-)

Head over to Papercraft Star and see what all the designers have come up with.


The name of the challenge this week is 'Clean and Simple Card'.
Here is the Sketch: I hope you can come over and play along! Entries can be linked until Friday @ Midnight EST.

And voting starts bright and early Saturday Morning, and goes through Monday. Winners will be announced Tuesday.

Enjoy,
Dawn
Supplies List:
Kraft Cardstock, cut to 11X4.25, and scored at 5.5
Medium Brown Paper, cut to 5X3.75.
Horse Bottom is from 'Horse Words' by Flair Design Inc roughly 1X2
Saying is a sticker from Rusty Pickle
Brown Cardstock for matting
Jute Twine for under the horse w/matting & Rusty Pickle Sticker w/matting
Pop Dots for lifting
white Sakura Jelly Pen for white dots
Walnut Stain, Tim Holtz Distress Ink for edges

Saturday, August 21, 2010

Papercraft Star, Challenge #10 Sneak Peek!

It's time for another sneak peek for challenge #10 over at Papercraft Star! That's right... you ARE looking at a horses rear. :-) I can't wait to show this card, I absolutely think it is a kick in the pants! :-)

Enjoy!

Dawn

Wednesday, August 18, 2010

Papercraft Star Challenge #9

Here it is, Ladies and Gents-- my card for challenge #9 over at Papercraft Star! Hurry over and enter your projects! You have until Friday at Midnight (EST) to get your entries in, and voting will begin Saturday Morning.

Supplies I used are:
The paper is from My Little Yellow Bicycle.

All lace is Rusty Pickle
Letter stickers are flexible and adhesive plastic purchased from Joannes, but I'm not sure the brand.
The vintage image, is from a sticker set I picked up at Lila's Scrapbooking.

Enjoy!!!

Dawn

Saturday, August 14, 2010

Papercraft Star- Challenge #9 Sneak Peek


The challenge this week for Papercraft Star, is a vintage carnival type photo:


Of course, I chose to make a card for this challenge. I LOVE making vintage looking things. Call my bad habit, but almost everything needs to either be distressed, have lace or a vintage 'image' of some sort on it.

After your wait.... here is your sneak peek!Enjoy!

Dawn

Wednesday, August 11, 2010

Papercraft Star Challenge #8 - Poodle Thank You Card

This is what I've created for Papercraft Star this week!


Our challenge (that is going on still!) is Buttons, Bows & Bling and I'm in LOVE with this little poodle from Create A Critter! I've been on a chipboard run at the moment, and created this 'Merci' saying from layers of thin chipboard, glued together and then the top layer made of a thick patterned paper. I made the buttons as well (not literally the buttons themselves, lol) but I did use clear buttons, stuck them onto patterned paper that matches the phrase, let them dry, popped out the paper blocking the holes, and cleaned them out before running some embroidery floss through to tie through them. You can read the full tutorial, with photos here.

Here's a rundown on Papercraft Star:

Papercraft Star is a challenge blog that presents paper crafters of all skill levels with new challenges each week. Upon entering your project in the challenge the public is provided with an opportunity to vote on all projects entered for that challenge. At the close of the challenge the top vote getter will receive a Papercraft Star button and sometimes valuable prizes. Every three weeks, winners of the previous three challenges will move forward into the finals where the Judges will then select a Papercraft Superstar for that challenge period.

I hope you enjoy and can take a minute to play along with us, or vote for your favorite projects!

Dawn

Monday, August 9, 2010

Patterned Button Photo Tutorial

Hey Everyone!

I know a lot of you are followers currently, and some of you (hopefully!) are just popping through from Papercraft Star for some inspiration. I don't do many tutorials anymore, as my video camera is a little touchy, and it seems to take me way longer than (I think) it should to make a video.

I made this photo tutorial, in hopes of helping some of you to make some customized buttons for your cards or other projects!

Here we go.....

Button Tutorial

Ingredients:
Clear Buttons
Beacon's 3 in 1 Craft Glue (or other clear, quick dry glue- like Glossy Accents, Zip Clear, etc. Glues that start out white, and dry to clear won't work so well with the clear buttons)
Patterned Paper (or scraps)
Craft Knife (X-acto Style)
Sanding Block (I use a fingernail sanding block from Sally's Beauty Supply-- much less expensive than a craft supply sanding block and the same thing)
Embroidery Needle & Embroidery Floss


Step 1: Put a small drop of glue onto the patterned paper you are using. Make the dot just big enough to fill the center of the button. Press the button onto the glue firmly. Try to use just enough glue that it will only squish from the holes, but not the sides.


Step 2: Once they are set, use a craft knife to cut around them, trying to stay as close to the buttons as possible, but being careful not to shift them too much on the paper since the glue isn't fully dry.

Step 3: Let them dry just a few minutes (I used this chance to switch laundry and start a new load which took maybe 3 minutes) to make sure you won't move them when you trim them up around the edges. Use your craft knife again, and trim the paper away from the edges just a little (but not enough to see from the front). Use your sanding block to lightly sand the edges of the paper to smooth them (try not to scrape up your button fronts, or they will show the scratches).

Step 4: With the craft knife, punch little holes from the front of the button holes, into the back. Then, using your floss and needle, run from the back to the front, stopping and sort of 'twirling' the button firmly on the floss to clean some of the glue residue from the holes. Do this until the holes are cleaned out.

Step 5: If you'd like floss tied through the buttons, going in the front, and back out the front, make your double knot, and trim the ends of the floss. In this photo, I mounted buttons after adding string, onto kraft cardstock so they were more smooth on my card.

Step 6: With either a little glue, or a pop dot add them to your project. (note: If I choose not to back them after tying the string on, I generally use pop dots on the back, because they generally come in every size a button could need and add dimension.)


I hope this has helped and you are confident enough to know that you can make these for any project that needs that extra touch of personalization!

Enjoy!!

Dawn

Sunday, August 8, 2010

Papercraft Star Challenge #8 Sneak Peek

I am soooo proud of what I made for this week's challenge over at Papercraft Star.

For our challenge this week: Buttons, Bows, Bling was what we were all given to work with. I fell in love as I started!


Here's your little peek to keep you hanging!


My project will go live on Thursday, so climb on over now and see what the other fabulous designers have come up with, and follow along all week while we get the submissions. Cast your vote at the end of the week, and maybe even play along!

Enjoy!

Dawn

Wednesday, August 4, 2010

Papercraft Star, Challenge #7 - ROAR!!!!!!

Hey Everyone! I am thrilled to be able to share with you this layout. I created it for Papercraft Star's Photo Challenge #7. I've been waiting so long it seems like to share this layout, it's probably in the top 10 of my favorites I've made.

I got to use my Create A Critter Cartridge, which is one of my newer ones and being that I normally make more whimsical and kiddy looking things, it has come in very handy! I just love it! Of course, this little lion if from the cartridge, along with the chipboard 'RoAr' that I made from 'scratch', and then inked it. Just LOVE how it turned out!
Abbey Road by My Minds Eye paper (Stomp Collection- big attitude plaid sky)
Create A Critter Cricut Cartridge for my lion (cut @ 3") and phrase (cut at 3")
Tim Holtz Distress Inks in Fired Brick, Peeled Paint & Walnut Stain
DCVW Nana's Kids Paper Stack (for striped paper and pattern on the R & A)
white and red cardstock
Enjoy!
Dawn

Sunday, August 1, 2010

Papercraft Star- Challenge #7 Sneak Peek

You guys are going to just LOVE what I've done with this challenge. I know I do!

My project will be featured on Thursday, August 5th-- so head on over to Papercraft Star and play with us! The challenge this week is a photo challenge, and the photo (below) is adorable and gives so much to work from!


Remember that over at Papercraft Star, the winner is chosen by the public, who can vote for whichever entry (link) they think is the best! We also have a winner, chosen by the judges and a Design Team member also wins based on people's choice as well.

I hope if you can, you will play with us, and if not- at least take a minute to check out the entries and vote!

Thursday, July 29, 2010

Papercraft Star- Challenge #6- Hang in There Card

For Papercraft Star, challenge #6, I used my Cricut with the Wild Card Cartridge.


I used the Argyle Card cuts for the patterns.

There are two layers, and a background shape that I cut by hand.


I did embossing on all the layers, except the bottom (front) later, which I just inked very heavily! I then sanded the paper to add dimension, and inked the embossed imaging to bring it out.


The blue paper is Core'dinations, and all the other paper I used was from the DCWV Mi Casa Textured Stack. Ribbon & brads are from my stash. Embossing was done with swiss dots & d'vine swirls cuttlebug folders.

Monday, July 26, 2010

Announcement::: Blog Hop Winners!

Good Morning Everyone!

I know some of you have been awake for a while now, and I mentioned bright and early... which in our house means about 7am, PST. Zoe is still asleep (whooo hooo) and I'm working away before I leave for another job (we get to Muck Stalls today and cuddle with horsies, yay!!!!!!!!!!!)

I was up way too late last night, while the hubbs watched Whale Wars & the Pit Boss. I was cleaning up my house (which I had neglected all weekend because we've been playing outside!) and baking blueberry muffins with the fresh blueberries Zoe and I went and picked yesterday morning for a birthday party. What a fun party, all the little kids got to pick to their hearts content, and chomp them down as well. We got ice cream afterwards which was perfect being that I'm pretty sure it was close to 90 degrees here yesterday.

Onto the winners:

For the first blog candy, you needed to add my button to your blog, and become followers of both my blog and Papercraft Star! The winner is (drumroll please........) Leeanne Ridley. Leeanne, please email me your mailing information and I'll send out the Rusty Pickle Kit as soon as I get your information!

For the second blog candy, all you needed to do was become a follower of Papercraft Star & my blog. The winner for the Quick Card Kit by Dawn is....... Maureen Reiss. It's fun to me that her blog is Mo's Addiction! :-) Mo- send over your mailing information and I will get the Quick Card Kit out as soon as possible!

Congrats Ladies, and I want to take a second to thank EVERYONE who hopped through my blog last weekend. I was honored enough to be a part of the Blog Hop and can't wait for another.

Have a great day, and can't wait to hear you ladies!

Dawn

Sunday, July 25, 2010

Papercraft Star- Sneak Peek Challenge #6

Hey Everyone!
Here is your exclusive sneak peek at my entry for Challenge #6 over at Papercraft Star! This challenge is going on right now, and it is to base something from this sketch:


If you haven't yet: take a look at the Papercraft Star Blog. It's a hopin' place to be, and hosts great challenges based on not only sketches, but photos and other topics as well (like Simon Says!).
There is also a Papercraft Star Message Board, where you can talk to the designers and other users to discuss projects, accomplishments and anything else!

At Papercraft Star, the winner is chosen by the public, who can vote for whichever entry (link) they think is the best! We also have a winner, chosen by the judges and a Design Team member also wins based on people's choice as well.

I hope if you can, you will play with us, and if not- at least take a minute to check out the entries and vote!

Dawn

Thursday, July 22, 2010

Papercraft Star Challenge #5

Earlier in the week, I did a little sneak peek at my designer entry for Papercraft Star.


Today, I am featured over on Papercraft Star with my 'circle' layout for their challenge #5.

I used some wedding photos of me and my girls. Believe it or not, they are ALL my sisters! lol. I don't actually have any real biological sisters, but Jessica, Ann and Jamie are all my sisters (in law at least!). Nicole, who was also my maid of honor, and one of my best friends and I grew up next door to each other (from when I was 3 months old!) and although she is older than me, we have always been identical in most aspects (looks, likes and dislikes, personalities, etc). She is an amazing big sister to me, and actually has known me longer than any of my more official sisters.
In the photo from the left, we have: Jessica, Nicole, Myself, Ann & Jamie.
The beautiful photo of the speech, is from Nicole during the toast. The photographer, Kathleen Williams did an amazing job on ALL of the wedding photos and made them all look amazing!
For this layout I used LOTS of circles, since the name of the challenge was circles. I did lots of embossing and sanding as well, to distress the page some as well. A little bling added a lot to this layout. Like Paula Dean says 'Butter makes everything better'
I think that Bling makes everything better!
Enjoy!
Dawn